

As some of you know, we purchased a house in Colorado almost a year ago. The house was built in 1975, which means popcorn ceilings, textured walls, out-of-code electrical wiring, layers of crazy paint colors and wallpaper, and, my favorite, asbestos. Oh, and some ugly built ins. For more background and to read my first home project update, click here!
OK, for this round, let’s start with the most dramatic change: exterior paint!
We knew right away that we wanted to change the exterior color which we called “sand” if we were being generous and “yellowish tan” if we were not being generous. You can see my previous post for a visual. I wanted to go with a simple grey with a bright white trim, but my husband wanted a blue house with a red door, which is all the rage. Whomp whomp. After playing quite a bit with those online color tools, we decided to take a leap of faith on Billiard Green from Sherwin Williams with Benjamin Moore Chantilly Lace trim. As you may recall, I had already started painting the house interior Chantilly Lace. We hired painters for this because homie cannot paint that much. Worth every penny. We also had them paint the interior at the same time to save a little moolah but more on that later. (We had also replaced the garage door with a Chi plank (faux) mahogany door because, well, I backed into ours.) Here is a picture of the finished product!

For the inside of the house we thought our first request was a simple one: open the wall between the back den and the front living room. As you might have predicted — if you are smart unlike us — that this would not be so simple! In fact, this took no fewer than big 10 steps of work.
First, the structural engineer. We had a structural engineer come out to diagnose our wall and prescribe a proper opening size, beam, etc. Of course, after about a month of trying to get on his schedule, he finally determined that our wall was load bearing. He would permit a 6 foot opening with a beam. We would have loved to open the wall completely, but it wasn’t in the cards. I guess a standing house is worth it…
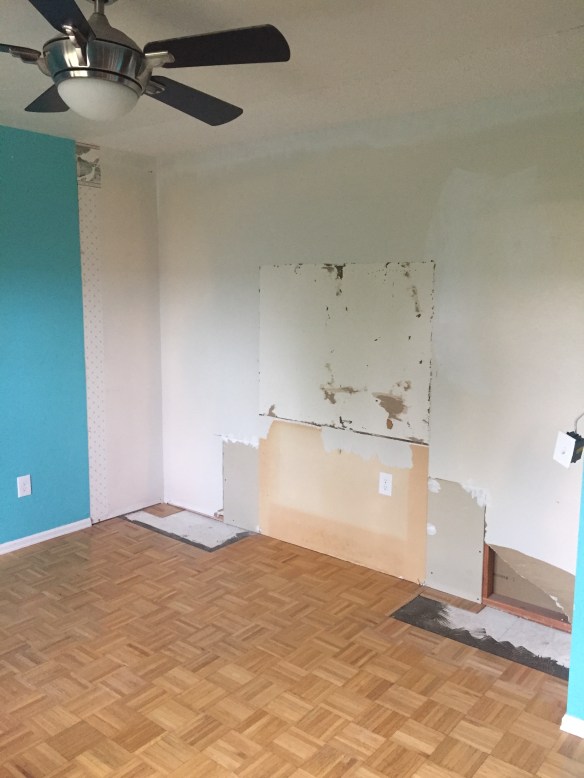
Second, the asbestos. We knew there was a high likelihood that the walls and ceilings of our home contained asbestos. We had them tested soon after we moved in and our suspicions were confirmed. Asbestos is not considered harmful when it is in the walls, but any time you do work that releases the asbestos as dust, that presents a risk to workers and inhabitants. For our wall removal, we’d need to hire an abatement company to remove the asbestos from affected areas. Since we were getting the permits and would be homeless for a few days anyway, we decided to also abate the popcorn ceilings throughout the house (photo above). Those ceilings were horrible. This process was actually pretty easy, but pricey. We stayed in an Airbnb for a few days while the work was completed, and when we came home our wall to be removed was just a handful of 2 x 4s!
Third, the drywall. After abatement, our ceilings were raw-looking so we had the drywall guy finish them up nicely, so smooth and bright without all that popcorn! He also fixed the drywall in the guest room that was messed up from the built ins we had removed.
Fourth, the paint. After the drywall was done on the ceilings, we had nearly the whole interior of the house painted Chantilly Lace, to match the painting I’d already done. We left the green guest bathroom green (duh) and left a few other smaller rooms the existing grey.
Fifth, the ducts. With the abatement complete, our contractor’s first task was to move two ducts that were in the center of the wall, right where we wanted to create our passthrough. Unfortunately, he didn’t realize before abatement that these ducts were there, which meant that to move the ducts he would need to go down into the upstairs flooring, rather than going the more easy route through the downstairs ceilings (which have asbestos). One of the rooms affected upstairs had carpet, and it was easy enough to roll back the carpet, dig a hole in the floor, and move the duct. But the other affected room was the guest room with parquet floors. There was no way to get into the flooring to move the duct without destroying the parquet. So we decided to remove the parquet and replace it with hardwood. My husband spent literally dozens of hours prying each splintering parquet tile from the grasp of the glue on that floor. Kudos to him!
Sixth, the beam. Once the ducts were shifted over, the contractor installed the proper (I hope) beam across the top of the load-bearing wall and removed the 2 x 4s that were holding up the wall. We had a pass through finally!
Seventh, the drywall again. The newly-constructed wall surrounding the pass-through needed drywall.
Eighth, the paint again. And then it needed to be painted, along with the living room, which we hadn’t had painted in the first round because of the work still to be done there. I painted these all, you guessed it, Chantilly Lace.
Ninth, the floors. In the homestretch! Our floor guys installed a lovely wider-plank oak hardwood floor in the den, living room, and guest room. Then they stained it to match (close enough) the existing hardwood floors in the house. The stain was REALLY stinky so I probably would have stayed in a hotel that night if I had known. I actually considered sleeping in the car. My husband thought I was nuts. But the floors look great and are a huge improvement over the pink carpet we used to have in the den! (Also, this house will have no composite floors, thank you very much.)
Tenth, the baseboards. Finally, our contractor stained and installed wood baseboards to match the other baseboards in the house and to correspond to the new hardwood floors.
Here are a few before and after photos of the areas we renovated. Note that decorating isn’t complete yet — we still need to hang lots of pictures in some spots and buy some more furnishings!
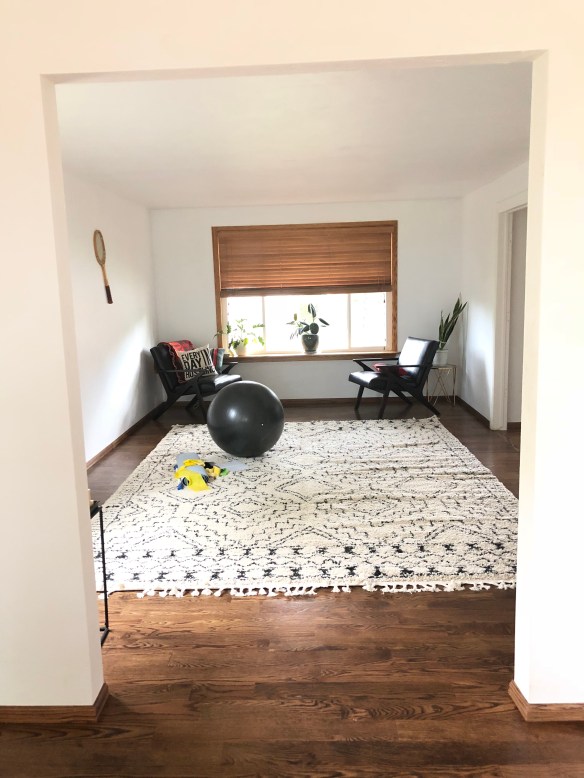
The Guest Room
Then:
Now:

The Living Space
Then:

Now:
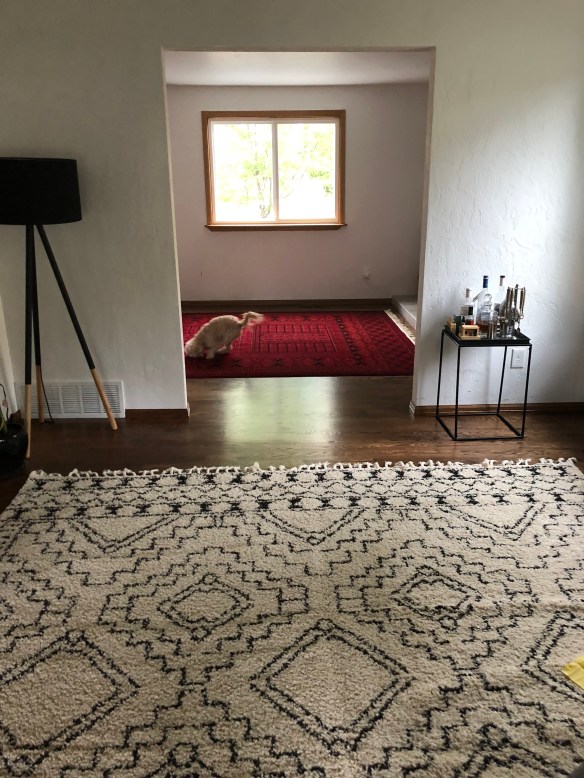
Then and Then:


Now:

I am so glad this round of renovations is done! We’ve also been having some work done in the yard, had our hot tub professionally cleaned, had the HVAC system professionally cleaned (so needed!), and got a new sprinkler system for outside. More updates on landscaping to come! The next big interior project will be the master bath but that is going to be a big $$$$ project so that will be in a bit!

Pingback: Home Project Update Number 3: The Bathroom | athlettuce